<# * FileName: Microsoft.PowerShell_profile.ps1 / PowerShell configuration file. * Author: 刘 鹏 * Email: [email protected] * Created Date: 2021, Aug. 21 * Updated Date: 2023, Oct. 11 * Copyright: No copyright. You can use this code for anything with no warranty. #>
#------------------------------- Import Modules BEGIN ------------------------------- # 引入 posh-git Import-Module posh-git
# if Windows server 2022 # oh-my-posh init pwsh --config C:\Program Files (x86)\oh-my-posh\themes\paradox.omp.json | Invoke-Expression #------------------------------- Import Modules END -------------------------------
#------------------------------- Set Hot-keys BEGIN ------------------------------- # 设置预测文本来源为历史记录 Set-PSReadLineOption-PredictionSourceHistory
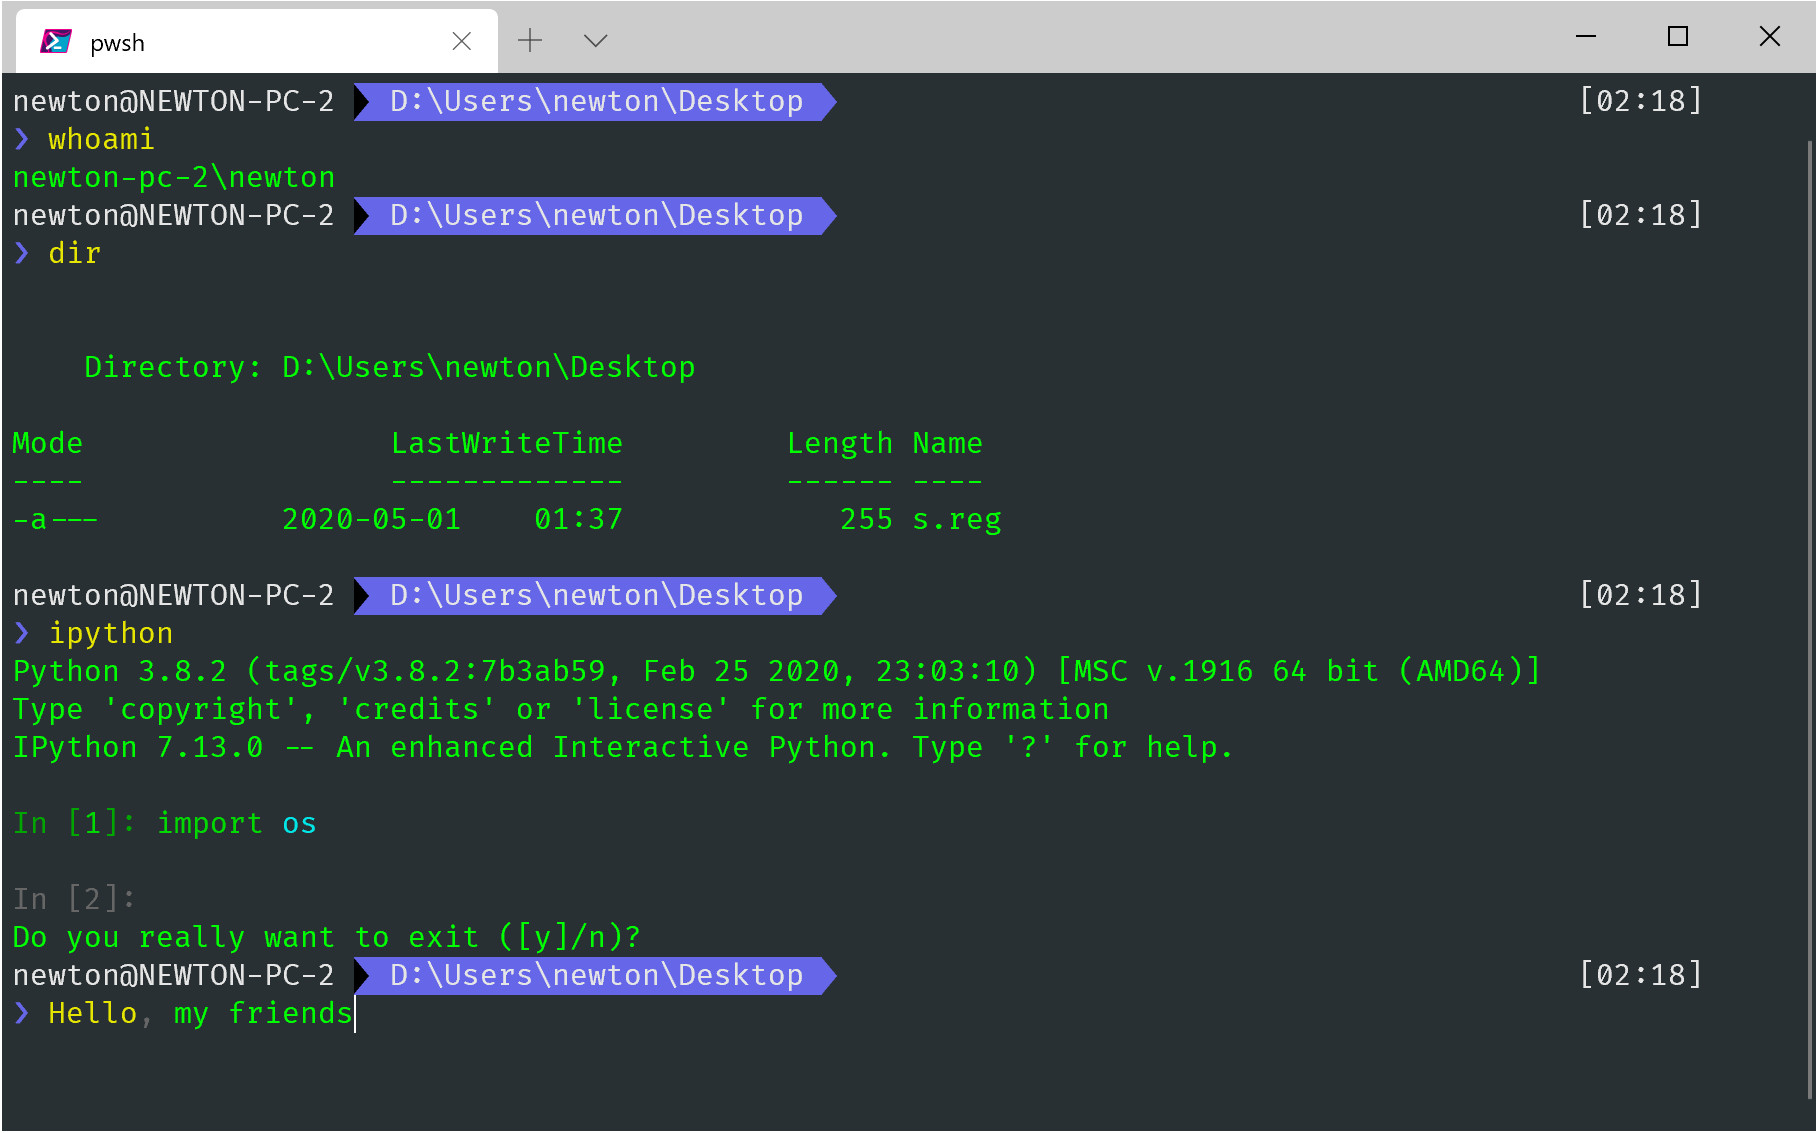
# 设置 Ctrl D 为退出 Set-PSReadlineKeyHandler-Key"Ctrl+d"-Function ViExit
# 设置 Ctrl Z 为撤销 Set-PSReadLineKeyHandler-Key"Ctrl+z"-Function Undo
# 启用预测性 IntelliSense Set-PSReadLineOption-PredictionSourceHistory #------------------------------- Set Hot-keys END -------------------------------
#------------------------------- Functions BEGIN ------------------------------- # Python 直接执行 $env:PATHEXT += ";.py"
# 更新系统组件 functionUpdate-Packages {
# (1) Update Conda # Reference: https://docs.conda.io/projects/conda/en/latest/commands/update.html Write-Host"Step 1: 更新 Anaconda base 虚拟环境"-ForegroundColor Magenta -BackgroundColor Cyan conda update -n base --yes--all if ($LASTEXITCODE-ne0) { Write-Error-Message"Failed to upgrade Conda base environment." return }
# (2) Update TeXLive $CurrentYear = Get-Date-Format yyyy Write-Host"Step 2: 更新 TeX Live"$CurrentYear-ForegroundColor Magenta -BackgroundColor Cyan $commandName = "tlmgr" if (Get-Command$commandName-ErrorAction SilentlyContinue) { tlmgr update --self--all } else { Write-Warning"The command '$commandName' does not exist." Write-Warning"Now continue." } if ($LASTEXITCODE-ne0) { Write-Error-Message"Failed to upgrade TeXLive packages." return }
# (3) Update Apps using winget Write-Host"Step 3: 通过 winget 更新 Windows 应用程序"-ForegroundColor Magenta -BackgroundColor Cyan winget upgrade if ($LASTEXITCODE-ne0) { Write-Error-Message"Failed to upgrade winget." return } # winget upgrade --all } #------------------------------- Functions END -------------------------------
#------------------------------- Set Alias BEGIN ------------------------------- # 1. 编译函数 make functionMakeThings { nmake.exe $args-nologo } Set-Alias-Name make -Value MakeThings
# Resolve the path to a full path (absolute path) $FullPath = Resolve-Path-Path$Path
# Check if the path exists and it's a directory if ((Test-Path-Path$FullPath) -and ((Get-Item-Path$FullPath) -is [System.IO.DirectoryInfo])) { Invoke-Item-Path$FullPath } else { Write-Error-Message"The path $Path does not exist or is not a directory." } }
# 5. 更改工作目录 functionUpdate-Directory { param ( # 输入要切换到的路径 # 用法示例:cd D:/ # 默认路径:C 盘的桌面 $Path = $env:USERPROFILE + '\Desktop' ) Set-Location$Path } Set-Alias-Namecd-ValueUpdate-Directory-Option AllScope #------------------------------- Set Alias END -------------------------------
#------------------------------- Set Network BEGIN ------------------------------- # 1. 获取所有 Network Interface functionGet-AllNic { Get-NetAdapter | Sort-Object-Property MacAddress } Set-Alias-Name getnic -ValueGet-AllNic
# Upgrade Write-Host"===================================== ↓ ↓ ↓ ====================================="-ForegroundColor Magenta Write-Host"$serverName is getting updated"-ForegroundColor Magenta Start-Process-NoNewWindow-Wait-FilePath"ssh"-ArgumentList"$localUsername@$serverHost", "-p", $serverPort, "source ~/.config/zsh/.zshrc && os-update" if ($LASTEXITCODE-ne0) { Write-Error-Message"Failed to upgrade $serverName" } else { Write-Host"$serverName upgrading done"-ForegroundColor Magenta Write-Host"" } } Write-Host"All upgrading jobs are done."-ForegroundColor Magenta Write-Host"" } Set-Alias-Name remote-update-ValueUpdate-RemoteServer #------------------------------- Linux Control END -------------------------------
# Clear-Host
Set-PSReadLineKeyHandler-Chord'"',"'" ` -BriefDescription SmartInsertQuote ` -LongDescription"Insert paired quotes if not already on a quote" ` -ScriptBlock { param($key, $arg)
if ($line.Length -gt$cursor-and$line[$cursor] -eq$key.KeyChar) { # Just move the cursor [Microsoft.PowerShell.PSConsoleReadLine]::SetCursorPosition($cursor + 1) } else { # Insert matching quotes, move cursor to be in between the quotes [Microsoft.PowerShell.PSConsoleReadLine]::Insert("$($key.KeyChar)" * 2) [Microsoft.PowerShell.PSConsoleReadLine]::GetBufferState([ref]$line, [ref]$cursor) [Microsoft.PowerShell.PSConsoleReadLine]::SetCursorPosition($cursor - 1) } }